Table of Contents
Log in to cPanel:
- Open your web browser and go to your cPanel login page.
- Enter your username and password to log in.
Go to the “Select PHP Version”:
- In the cPanel dashboard, scroll down to the “Software” section.
- Click on Select PHP Version.

Select the PHP Version:
You will see a dropdown menu that allows you to choose the PHP version. Select the PHP version you’re using for your website.
Enable the GD Library:
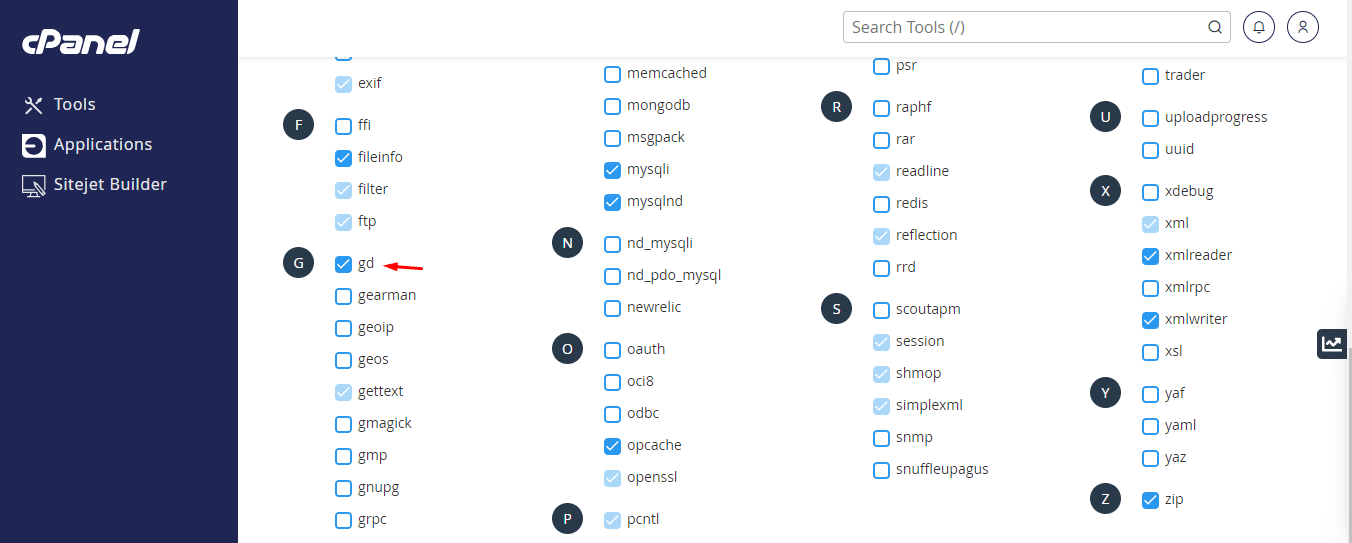
- After selecting the PHP version, a list of available PHP extensions will appear.
- Look for the “gd” extension in the list.
- Check the box next to “gd” to enable it.

Save the Changes:
After enabling the GD library, click the “Save” or “Apply” button to save the changes.
Verify GD Library Installation:
- To ensure the GD library is enabled, you can create a PHP info file.
- Create a file called phpinfo.php with the following content:
<?php
phpinfo();
?>
<?php
phpinfo();
?>
<?php phpinfo(); ?>
- Upload this file to your website’s root directory and access it via your browser (e.g., http://yourdomain.com/phpinfo.php).
- Search for the “gd” section in the output to confirm it is enabled.
Remove the PHP Info File:
After confirming the GD library is enabled, delete the phpinfo.php file to prevent security risks.


